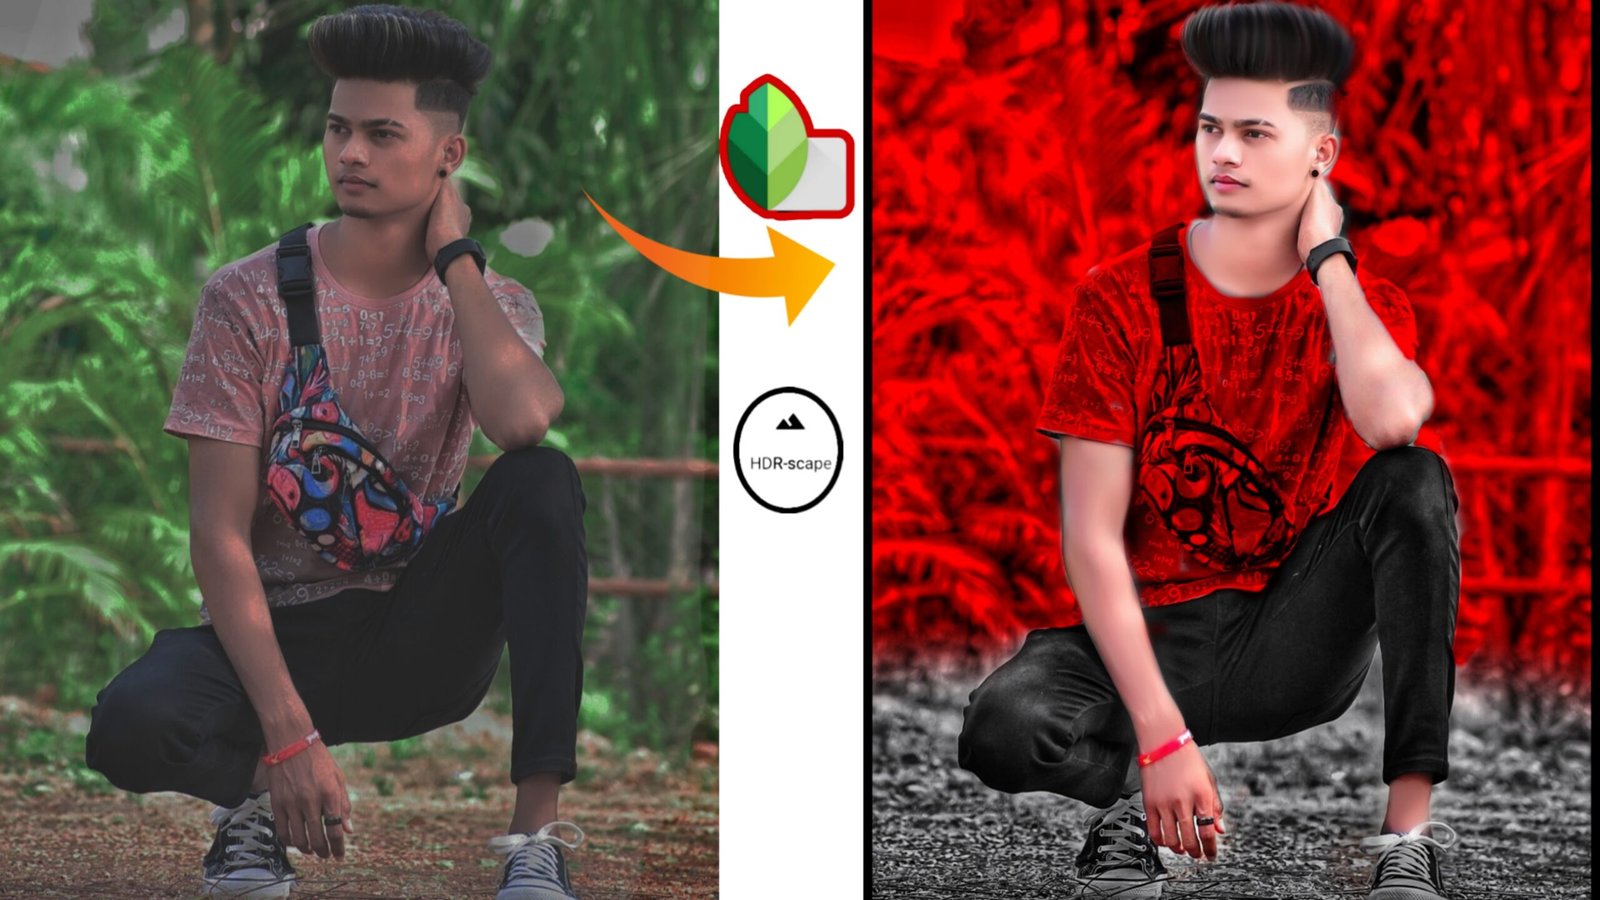
Red Tone Photo :- Hello friends, welcome back to your website, so in today’s post, we will learn that to learn snapsid photo editing red tone editing, you have to read the post completely.
Friends, you have to open Snapchat in a simple way and you have to see what are the flaws in your image, so as we see that the brightness of our image is very low, we click on the icon with the pencil and the twin image Click on it, after clicking in it you will see 8 options like Brightness Contrast Ambience Saturation etc.
then you have to increase the brightness to about 37 plus after that you have to write it here friends here in our image Brightness After that you have to click on the pencil icon again and click on that tool, after that, after reducing its saturation, after reducing, you have to remove the effect in the face.
You have to click on the icon with pencil, after that you have to click on SelectU, then from here you can glow your face and you can make the image shine, after glowing, you have to write right after friends. You have to click on the account with pencil again, after that you will have to click on the make tool If you want to do that then you will see five options, in 5 options you will see a red tone color, then you have to click on the red tone color and pull its rope downwards, when pulling down,
there will be a rate effect in your image, after that you will again After removing the effect in the face and hand, after removing, right after right click, friends have to click on the account with the pencil again, click on the portrait tool to match the background and then its setting. We adjust by adjusting the position slightly to make the image look a little CB type.
After that, friends, you have to click on the share option, after clicking on the share option, you have to open the sketch book Autodex, if you do not know how to play its Ducato Dicks, then you can see the video of it on my YouTube channel I have uploaded you guys, you have to open the sketchbook autodex, after that you will be seeing the gold item, you have to click in it and you will see a lot of brushes, out of which you have to come down to the smooth rain after that. Keep the size of your setting according to yourself and keep the follow on Thirty after that, friends, you have to smooth the skin, after smoothing the skin your pick will be completely ready.
Then you have to click on the hair, that means a box option will appear in it, by clicking on the plus option, you have to create a new layer, after creating a new layer, you have to click in that layer, after clicking on the player, you will get HSL. You have to click on the R option, after clicking, you have to increase its saturation and reduce its Hui.
After that, friend, you have to right. After right clicking, you have to click 3dot. After clicking, just image two devices. If you want to take it, friends, how did you like the post, definitely tell me and you should definitely comment in the next post bye bye friends.
Also Read :- Snapseed Pink Tone Photo editing Tutorial